Adding custom CSS and JavaScript
Most design tweaks — a color, a font size, a spacing — need just a few lines of CSS. You don’t need to edit theme files for that.
Find the right selector
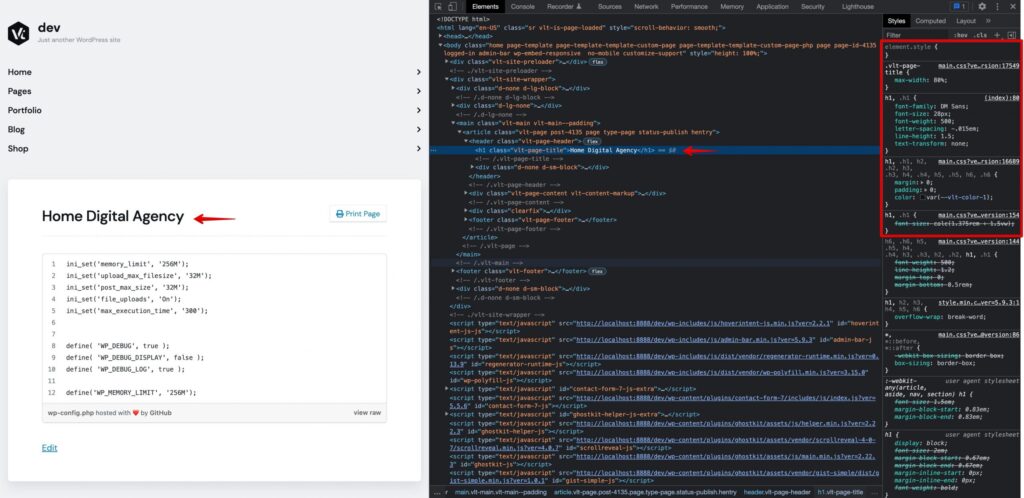
Browser developer tools show which CSS rules style any element and let you try changes live. Right-click the element and choose Inspect (Chrome, Firefox, Edge), or in Safari enable Settings → Advanced → Show Develop menu first.
- Right-click the element and choose Inspect.
- The HTML appears on the left, the CSS rules of the selected element on the right.
- Change values to preview the result — the page updates as you type.
- To add a new rule, click + in the styles panel. If the generated selector isn’t specific enough, prepend classes of the parent elements (
.before a class,#before an ID).
Save the CSS
Paste the final code into Appearance → Customize → Additional CSS and click Publish.
Custom JavaScript
Use a plugin such as Header and Footer Scripts:
- Go to Settings → Header and Footer Scripts.
- Paste the code into the header (inside
<head>) or the footer (before</body>). - Click Save settings.
For a larger script, upload it as a .js file to the child theme and connect it in the footer:
<script src="https://example.com/wp-content/themes/your-theme-child/js/custom.js"></script>
Was this article helpful?
Thanks for your feedback!